

Oil Burner Troubleshooting: Fix Heat, Cracks and Scent
The tealight is burning, but the bowl still feels cold. Or your electric warmer lights up without releasing much fragrance. Before you add more oil, check what's failing: a cold bowl, weak scent and a cracked bowl need different fixes.
Oil burner troubleshooting also means separating fragrance warmers from heating equipment. A scent warmer may need cleaning or the correct replacement bulb. A furnace or boiler needs a qualified technician and combustion measurements, not adjustments made by eye.
Table of Contents
Match Each Symptom to Its Likely Cause - Identify the part before buying a replacement
Safety Checks Before Any Burner Repair - Stop conditions you shouldn't troubleshoot
How to Restore Heat in a Scent Burner - Work through the heat path - Know when the heat source isn't serviceable
Clean, Repair or Replace the Bowl - Remove deposits without damaging the finish - Check the bowl's fit, not just its diameter
Why Scent Fades and How to Bring It Back - Separate oil problems from room problems - Change the test, not everything at once
Troubleshooting a Furnace or Boiler Oil Burner - Treat a low-tank shutdown as a fuel-system problem - Require measured combustion after repair
Match Each Symptom to Its Likely Cause
Symptom | Likely cause | First fix |
|---|---|---|
Bowl stays cold with tealight lit | Tealight too small or sunk into its cup | Extinguish it, let it cool, then fit a fresh tealight of the specified size |
Electric bowl stays cold | Dead or loose bulb | Unplug and cool, then reseat the bulb or replace it with the type and wattage printed on the base |
Bowl heats unevenly | Heat source isn't centred | Reposition the removable bowl or candle in its intended holder |
Scorched or sticky residue | Overheating or accumulated wax and oil | Clean the cooled bowl and verify the specified heat source |
Hairline crack in the bowl | Thermal stress, impact or an existing defect | Stop using the bowl and replace it |
Oil leaking under the base | Overfilled or cracked bowl | Stop heating, empty and inspect the cooled bowl, then clean the spill |
Flicker or buzz from electric unit | Loose bulb, incompatible bulb or electrical fault | Unplug, check the specified bulb, and replace the unit if the symptom persists |
Burning plastic smell | Overheated components or wiring fault | Unplug immediately if safe and stop using the unit |
These are quick inspection tasks, not permission to handle a hot bowl. Cooling takes as long as the appliance needs. Don't rush it because replacing a candle looks simple.
A visible flame doesn't prove that the bowl is receiving useful heat. A nearly spent tealight may leave its flame low inside the cup. An incorrectly seated bowl can also leave the heat source warming the side of the holder instead of the bowl's underside.
With an electric warmer, distinguish a loose bulb from a loose socket. You can reseat a replaceable bulb while the appliance is unplugged and cool. A socket that moves in its mounting, has darkened contacts or shows melted material isn't a homeowner repair.
Identify the part before buying a replacement
Use our oil burner diagram to distinguish the bowl, holder and heat source. That prevents buying a bulb for a warmer that uses a sealed heating plate, or ordering a bowl that won't sit securely on the stand.
Don't compensate for poor heating with a larger candle or a higher-wattage bulb. Likewise, don't assume a lower-wattage bulb is suitable unless the manufacturer permits it. Correct fit and specified output matter more than brightness or flame size.
The table gives the first check only; if that check fails, use the appropriate cleaning, heat or replacement procedure below.
Safety Checks Before Any Burner Repair
Disconnect power or extinguish the candle before touching the warmer. Let the bowl, bulb and metal holder cool completely. A switched-off appliance can still burn your fingers or damage the surface beneath it.
Set the burner on a flat, heat-resistant surface, away from curtains, paper, bedding and shelf overhangs. Keep its cord away from the heated bowl. Never leave a lit tealight unattended or place a warmer where someone can knock it over.
Our guide to oil burners for home can help you distinguish the different designs before choosing a safe location.
Stop conditions you shouldn't troubleshoot
Burnt-plastic or electrical smell: Stop using the appliance. Don't open the base to investigate.
Sparking or smoke: Disconnect power only if you can do so safely. Keep clear of damaged electrical parts.
Oil pooling underneath: Stop heating and inspect only after everything has cooled.
Furnace rumbling, soot or repeated lockouts: Arrange professional heating service rather than attempting burner adjustments.
Carbon-monoxide alarm or suspected exposure: Leave the building, get into fresh air and call emergency services. Don't remain inside searching for the cause.
Oil-fired heating equipment can produce invisible, odorless carbon monoxide. The CDC furnace safety guidance recommends professional inspection every year; the absence of an oily smell doesn't establish safety.
Safety boundary: DIY warmer maintenance means cleaning accessible parts and replacing explicitly user-serviceable components. It doesn't mean repairing wiring or combustion equipment.
Before proceeding, ask: Is the unit disconnected and cool? Are smoke and abnormal smells absent? Is the task limited to an accessible, serviceable part? If any answer is no, stop and arrange help or replace the warmer.
How to Restore Heat in a Scent Burner
Start with the appliance instructions, not an improvised oil recipe. Some bowls require water with fragrance oil; others accept approved wax or a specified fragrance preparation. Don't run a water-based burner dry or put neat essential oil into a bowl unless its instructions allow it.
The illustration outlines the basic sequence. Use your warmer's instructions for cooling, filling and operating details.
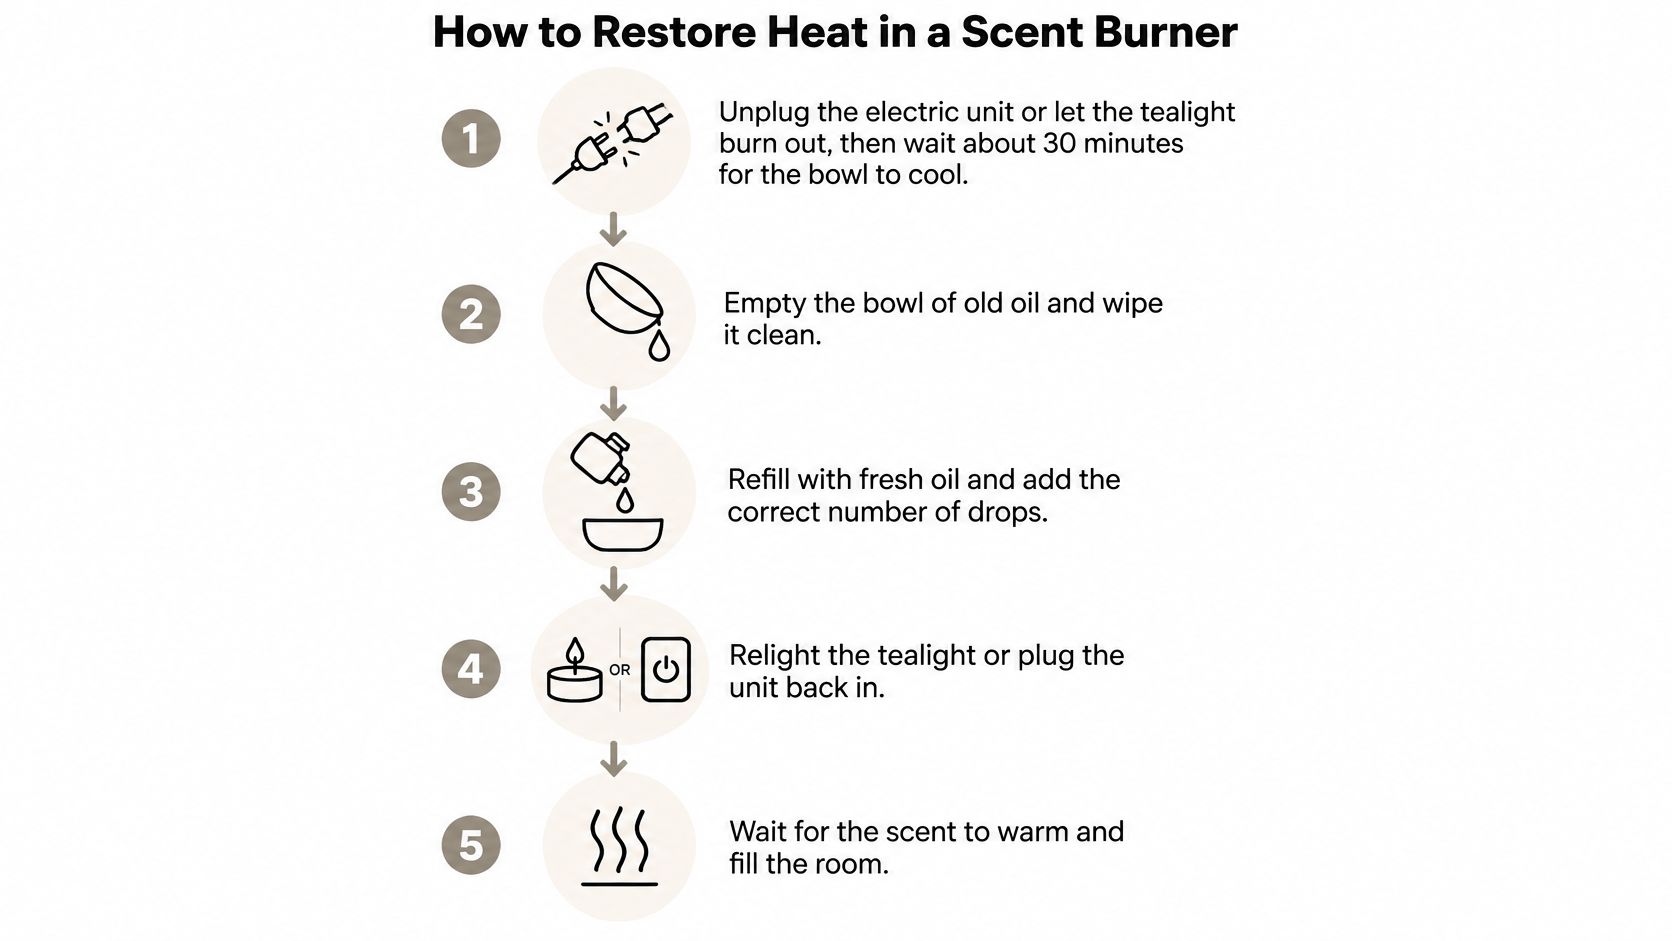
Work through the heat path
Make the unit safe. Unplug the electric warmer or extinguish the tealight, then let every heated part cool completely. Don't lift the bowl while its contents are hot or liquid wax can spill.
Remove the old contents. Empty the removable bowl appropriately and clean away residue using a method suitable for its material. Don't pour wax or concentrated fragrance oil down the sink, and don't immerse an electrical base.
Check the supply. For an electric model, inspect the plug and cord without opening the housing. A damaged cable, scorched plug or intermittent switch means the unit shouldn't be powered again.
Inspect the heat source. Fit the specified tealight, or check that a replaceable bulb has the correct base, shape and wattage. Tighten a bulb gently while unplugged; forcing it can damage the socket.
Seat the bowl properly. Make sure it rests level on its intended supports with the heat source centred beneath it. Don't wedge it into position with foil, cardboard or a makeshift spacer.
Refill for the actual design. Use the approved fragrance medium and follow the marked fill level or product instructions. Leave room for the contents to move without spilling, rather than filling to the rim.
Run a supervised test. Restore power or light the candle and observe normal operation without touching heated surfaces. If the unit remains cold, flickers, leaks or produces an abnormal smell, shut it down instead of increasing the heat.
Know when the heat source isn't serviceable
A sealed electric heating plate isn't repaired like a replaceable bulb. If its indicator works but the plate doesn't heat, opening the base isn't a sensible next step for a fragrance warmer.
For the trade-offs between replaceable-bulb designs and other electric models, see whether electric fragrance burners are worth it. Choose replacement based on serviceability and compatibility, not appearance alone.
Clean, Repair or Replace the Bowl
Clean an intact bowl. Replace a damaged one. Sticky oil and wax deposits can often be removed, but cleaning won't make a cracked ceramic bowl safe.
Remove the bowl only if the design allows it. For a washable bowl, use warm water, mild dish soap and a soft cloth. Let residue soften rather than attacking it with a knife or metal scraper.
Lift softened wax with a plastic scraper that won't gouge the glaze. Don't pour boiling water into a cold bowl, move hot ceramic into cold water or heat the bowl empty to burn deposits away. Those shortcuts can turn a cleaning job into a replacement.
Remove deposits without damaging the finish
A cotton swab helps reach an accessible recess or shallow well. It isn't a tool for pushing through an unknown opening in an electric warmer, where liquid could reach internal parts.
For persistent oil film, check whether the manufacturer permits isopropyl alcohol on that material. If permitted, apply a little to a cloth rather than pouring it into the appliance. Keep it away from ignition sources and allow the bowl to dry completely before reuse.
Our aroma diffuser cleaning guide offers related cleaning guidance, but don't treat every fragrance appliance alike. A ceramic bowl and an ultrasonic reservoir have different components and cleaning limits.
Problem | Repair it if | Replace it if |
|---|---|---|
Dirty or sticky bowl | Residue lifts without damaging the finish | Deposits can't be removed safely or the glaze is damaged |
Dead bulb or tealight | An approved replacement restores normal heat | The socket is loose, scorched or burnt |
Hairline crack in bowl | Not suitable for a household sealant repair | Any crack is visible |
Weak scent with fresh oil | Approved loading and placement changes help | The unit still heats poorly after compatible parts are checked |
Burning plastic or electrical smell | Not a DIY repair job | Stop using the unit and replace it or obtain manufacturer-authorized assessment |
Check the bowl's fit, not just its diameter
A replacement must sit securely on the original support and maintain the intended clearance above the heat source. A bowl that rocks, touches the bulb or hangs unevenly isn't compatible, even if it looks similar.
Don't seal a crack with craft glue, epoxy or household sealant. The repaired area will face heat and fragrance ingredients, and a leak can reach the candle or electrical base.
Replace the bowl rather than trying to save it when the ceramic is cracked, chipped at a supporting edge or unable to sit flat.
We sell oil warmers and accessories, including fragrance bottles and droppers. For questions about an item or order, send us its identifying details through the Contact Us form. Don't assume a replacement bowl is available or compatible without checking.
Why Scent Fades and How to Bring It Back
A warm bowl with weak fragrance usually calls for a scent check, not more heat. Start with the fragrance loading, oil condition, room placement and whether the contents match the warmer's design.
Compare the bottle's aroma before changing the appliance. Gently waft the scent toward you rather than holding concentrated fragrance against your nose. If it smells unpleasant or noticeably different from its original character, adding more won't restore the intended fragrance.
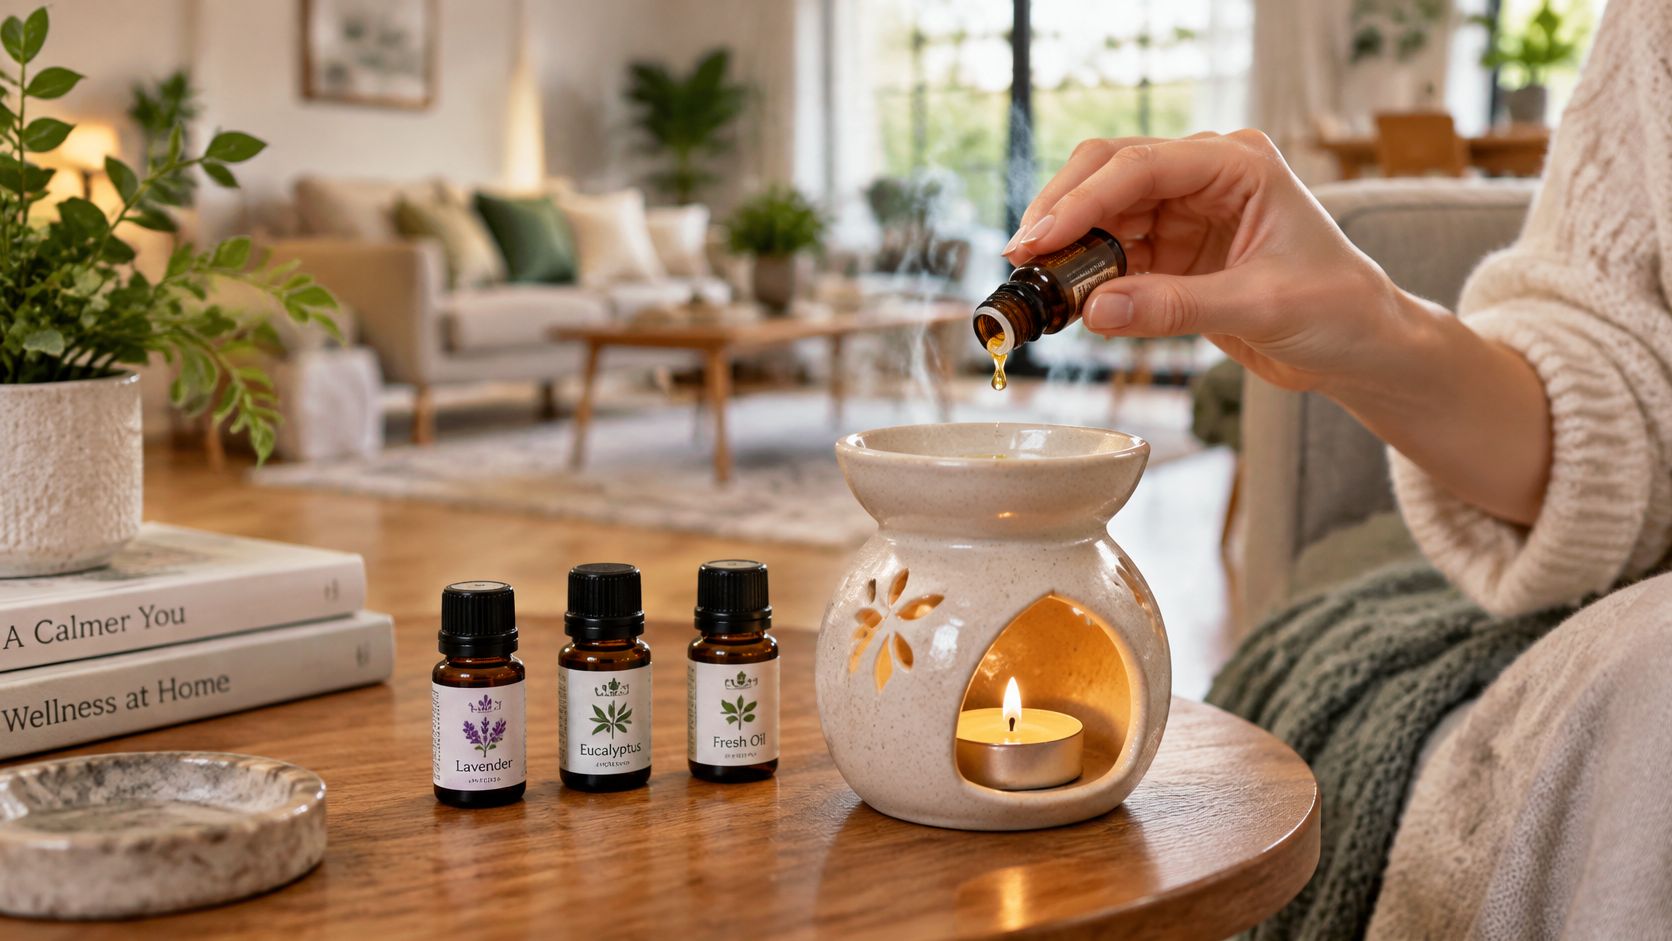
Separate oil problems from room problems
Insufficient fragrance loading: Increase only within the oil and warmer instructions. Flooding the bowl creates a spill risk rather than a controlled scent test.
Deteriorated or unsuitable oil: Check storage conditions, closure and intended use. Don't assume every fragrance oil is formulated for heated bowls.
Drafty placement: Move the warmer away from an open window or direct ventilation stream, while maintaining safe clearance.
Incorrect bowl contents: Use water only when the design requires it. Don't remove required water to make the fragrance seem stronger.
Our guide to fragrance oil uses helps distinguish applications before you choose an oil. Don't transfer an ingredient from a craft recipe into a heated appliance without confirming suitability.
Change the test, not everything at once
Keep the same oil while testing a different safe position. Alternatively, keep the position and test fresh, compatible fragrance at the approved loading. Allow the warmer to reach its normal operating condition before judging the result.
Practical rule: Change a single variable, then assess. More oil, more heat and a new location together won't tell you which change helped.
A large, open space may exceed a small warmer's useful coverage. Don't solve that mismatch by overheating it or crowding additional candles onto a shelf.
We don't accept returns on fragrance, incense or perfume oils because of the possibility of contamination. Check the intended application before opening an oil, and keep droppers and bottle openings clean.
Troubleshooting a Furnace or Boiler Oil Burner
Heating-oil equipment requires a different diagnostic process. Before anyone opens the burner, confirm that the thermostat calls for heat, the tank contains fuel and the system hasn't been deliberately isolated.
Leave voltage measurements and internal inspection to a qualified technician. The Rheem troubleshooting procedure includes checking approximately 120 VAC at the control input; that's a live-electrical test, not a homeowner check.
Symptom | Check first | Then inspect |
|---|---|---|
Motor does not start | Thermostat call, supply voltage, tank level, shutoff status | Primary-control lockout, wiring, limit circuits, filter, pump strainer, fuel-line restriction |
Motor runs, ignition fails | Nozzle condition, electrode gap, ignition spark | Combustion-air settings and burner alignment |
Soot, rising oil use, high stack temperature | Burner plate and air passages | Heat exchanger, nozzle, fuel filter |
Smoky or low CO₂ after repair | Air leakage, chimney draft, air–oil mixing | Flue-gas analysis by a trained technician |
Treat a low-tank shutdown as a fuel-system problem
Don't assume a delivery automatically fixes a burner that stopped after running low. Massachusetts oil-heat maintenance guidance warns that allowing the tank below roughly one-quarter full can draw sediment into the fuel line and burner.
A technician may need to inspect filtration, restrictions and air in the supply. Repeatedly pressing reset can introduce unburned oil without correcting the fault.
Soot also deserves investigation rather than a quick air adjustment. The Danfoss maintenance document reports that soot can increase oil consumption by about 2–4% for every millimeter of deposit.
Require measured combustion after repair
Historical National Bureau of Standards guidance describes about 9% CO₂ as good and above 11% as excellent, provided there's no smoke. These aren't universal adjustment targets for every modern appliance; the technician must follow its specifications.
A complete checkout includes draft, smoke, combustion gases and the correct nozzle and pump settings. The burner service manual supports instrument-based verification rather than judging a successful repair by visible flame alone.
For boiler-system context when discussing service scope, browse boiler equipment resources from Forge Reliability. Restored ignition isn't the finish line. Safe, measured combustion is.
Frequently Asked Questions on how to fix your aroma oil burner.
1. How often should you clean an oil burner?
Clean your oil burner after several uses or whenever fragrance residue begins to accumulate. Regular cleaning helps prevent old fragrance from affecting new scents and keeps the bowl in better condition. Always allow the burner to cool completely before cleaning.
2. Can you leave an oil burner on overnight?
No. Oil burners should never be left operating while you sleep or when nobody is supervising them. Tealight burners have an open flame, while electric models can develop overheating or electrical problems. Turn off and unplug electric warmers or extinguish tealights before leaving the room.
3. How do you prevent different fragrance oils from mixing in an oil burner?
Allow the burner to cool, empty the remaining contents and clean the bowl between fragrance changes. Even small amounts of leftover oil can alter the aroma of your next fragrance. A clean bowl provides a better way to experience each scent as intended.
4. Where should you store fragrance oils used in oil burners?
Store fragrance oils in tightly sealed containers in a cool, dry location away from direct sunlight and excessive heat. Keep bottles upright and away from children and pets. Proper storage helps protect fragrance quality and reduces the possibility of accidental spills.
5. Can you use the same oil burner for different types of fragrance oils?
Generally, yes, provided the warmer manufacturer permits the particular fragrance product being used. However, not every fragrance oil, essential oil or fragrance preparation is formulated for heating. Always check the product's intended application and the warmer's instructions before changing fragrance types.
Aroma Warehouse offers oil warmers, fragrance oils, bottles and droppers for home fragrance setups. Visit Aroma Fragrance Warehouse to choose a suitable replacement warmer or fragrance supplies, and use our Contact Us form if you need help identifying an item before ordering.


